How to Use the CMS in PrestaShop
Step 1: Access the CMS Section
- Log in to Your PrestaShop Admin Panel
- Access your admin panel by entering your store’s admin URL and logging in with your credentials.
- Navigate to the CMS Section
- In the left-hand sidebar, navigate to Design and then click on Pages.
Step 2: Add a New CMS Page
- Click on the Add New Page Button
- Click the Add new page button at the top right corner.
- Fill in the Page Information
- Title: Enter the title of the page. This will be displayed as the page’s heading.
- Meta Title: Enter a meta title for SEO purposes. This will appear in search engine results.
- Meta Description: Enter a meta description for SEO purposes. This is a brief description that will appear in search engine results.
- Meta Keywords: Add meta keywords for SEO purposes. These are keywords related to the content of the page.
- Friendly URL: Specify a user-friendly URL for the page. This should be short and descriptive, using hyphens to separate words.
Step 3: Write the Page Content
- Content: Enter the content of the page. Use the text editor to format the text, add images, videos, or any other multimedia elements.
- SEO Options: Configure additional SEO options if needed.
Step 4: Configure Page Settings
- Indexation by Search Engines: Decide whether you want search engines to index this page.
- Displayed: Choose whether the page is visible to customers. If you’re still working on it, you can leave it disabled and enable it later.
Step 5: Save the CMS Page
- Click the Save Button
- Once you have filled in all the necessary information and written the content, click the Save button at the bottom right corner.
Step 6: Manage Existing CMS Pages
- Edit Pages
- In the Pages section, you will see a list of all existing CMS pages.
- You can edit a page by clicking on the Edit button (pencil icon) next to the page.
- Delete Pages
- To delete a page, click on the Delete button (trash icon) next to the page. Confirm the deletion when prompted.
- Organise Pages
- Use categories to organise your CMS pages. For example, you might have categories for “About Us”, “Terms of Service”, and “Privacy Policy”.
- To create a new category, click on the Add new CMS category button and fill in the category details.
Step 7: Display CMS Pages on Your Store
- Add CMS Pages to the Navigation Menu
- Navigate to Design > Menus in the left-hand sidebar.
- Click on the Add new link button.
- Select the CMS page you want to add to the navigation menu and specify the menu location.
- Add CMS Pages to Footer
- Navigate to Design > Link Widget.
- Click on the Add new link widget button.
- Select the CMS pages you want to display in the footer and configure their order.
Step 8: Utilize CMS Blocks
- Create and Manage CMS Blocks
- CMS blocks allow you to group multiple CMS pages together and display them in different parts of your store.
- Navigate to Modules > Module Manager and search for the “CMS Block” module.
- Install and configure the module to create CMS blocks and assign them to various positions on your store.
Additional Tips for Using the CMS
- Content Quality: Ensure the content you create is high-quality, informative, and engaging to provide value to your customers.
- SEO Best Practices: Use relevant keywords, meta titles, and descriptions to optimise your CMS pages for search engines.
- Regular Updates: Keep your CMS content updated to reflect the latest information about your store, products, and policies.
12. How to use the CMS in PrestaShop
The CMS or Content Management System in PrestaShop allows you to create custom pages for your site.
1) Go to Tools.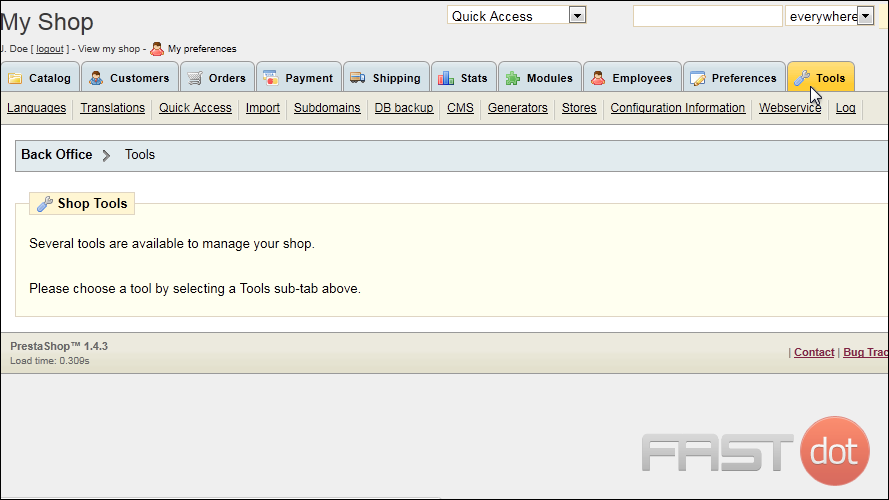
2) Click CMS.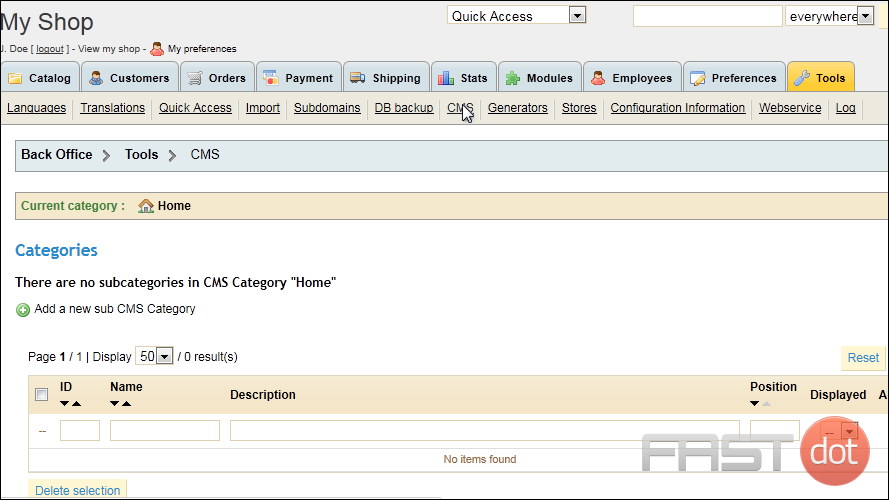
3) Scroll down to the existing pages.
4) Click this icon next to a page to view it.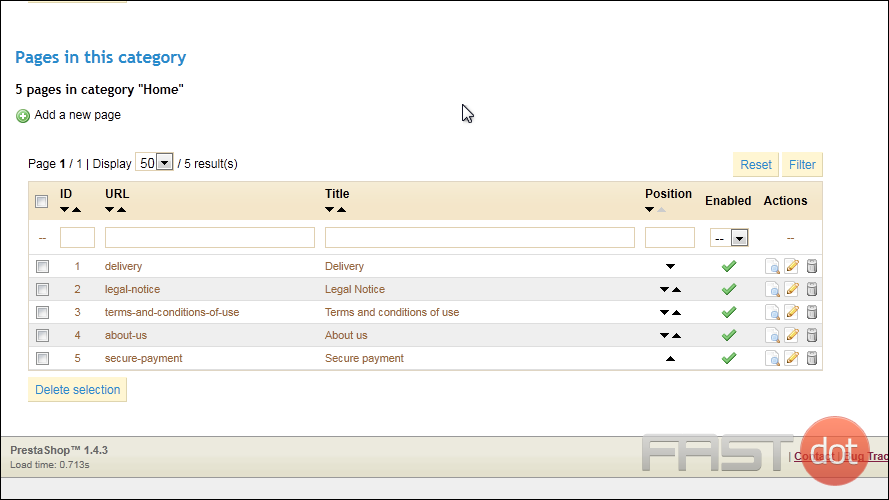
This is what the page looks like on the site.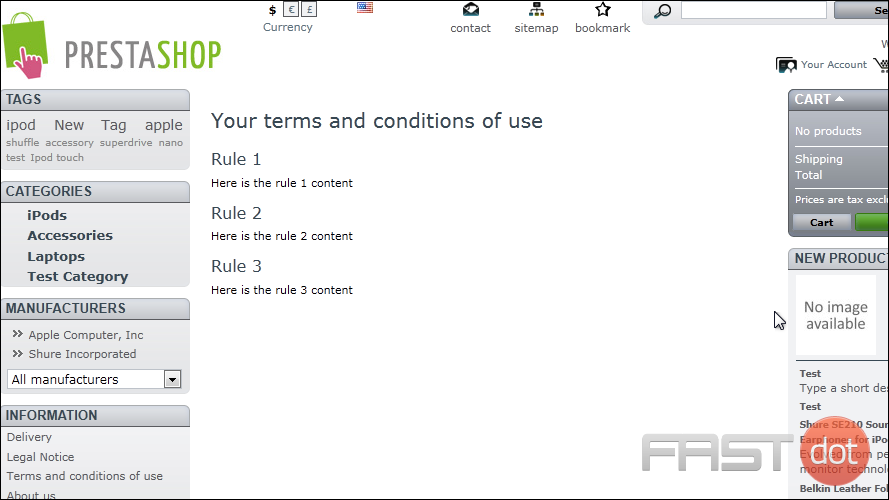
5) Click this icon to edit the page content.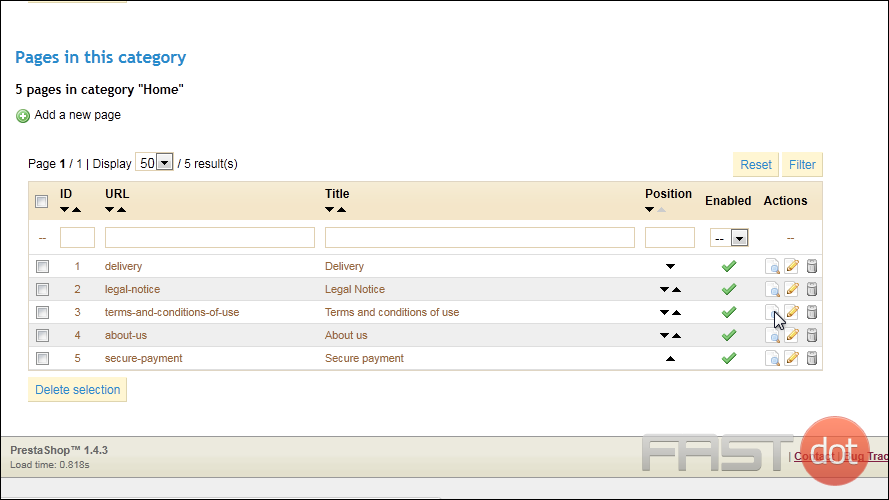
6) Edit the category, title, URL and more here.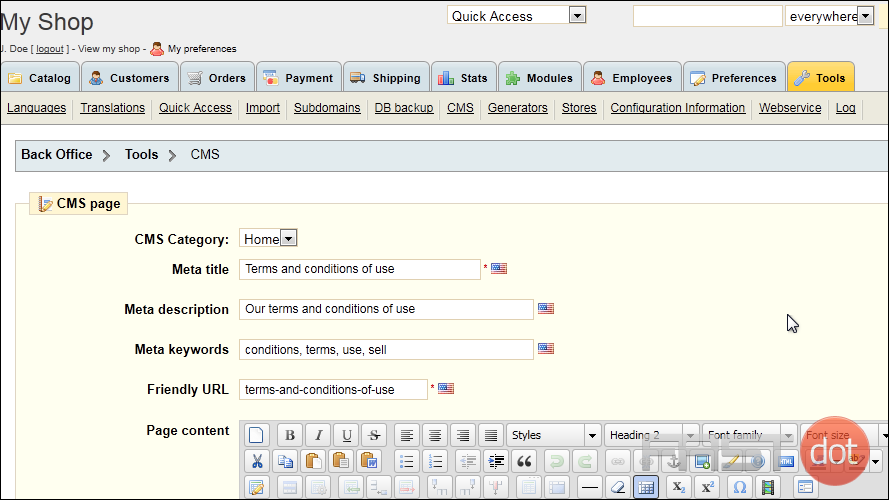
7) Type in this box and use the WYSIWYG editor to format your page.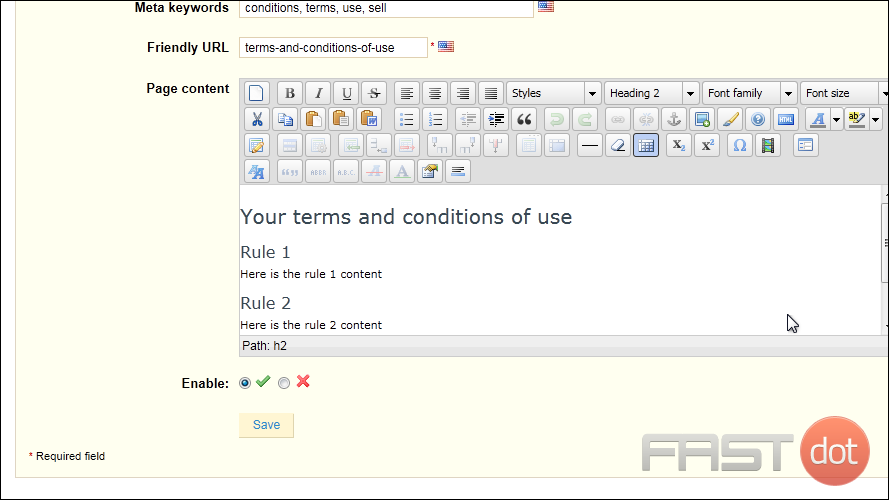
8) Click Save.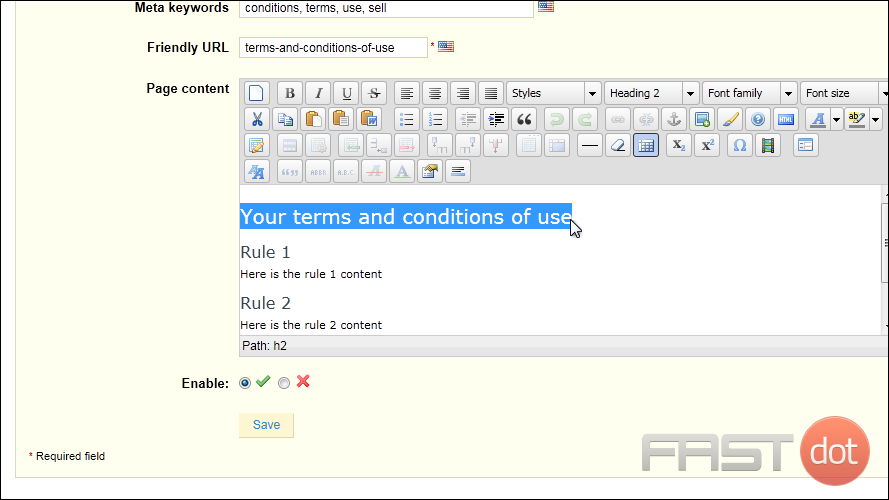
Now let’s create our own page.
9) Click Add a New Page.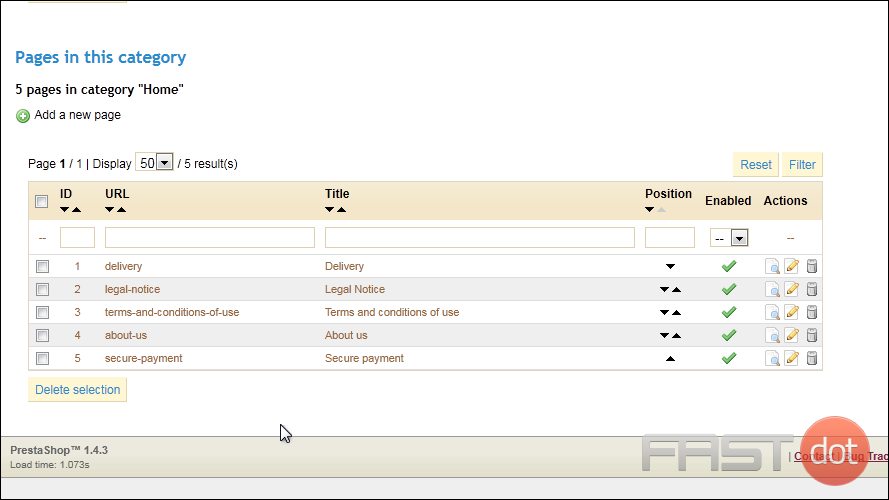
10) Type the Meta Title, Description, and Keywords.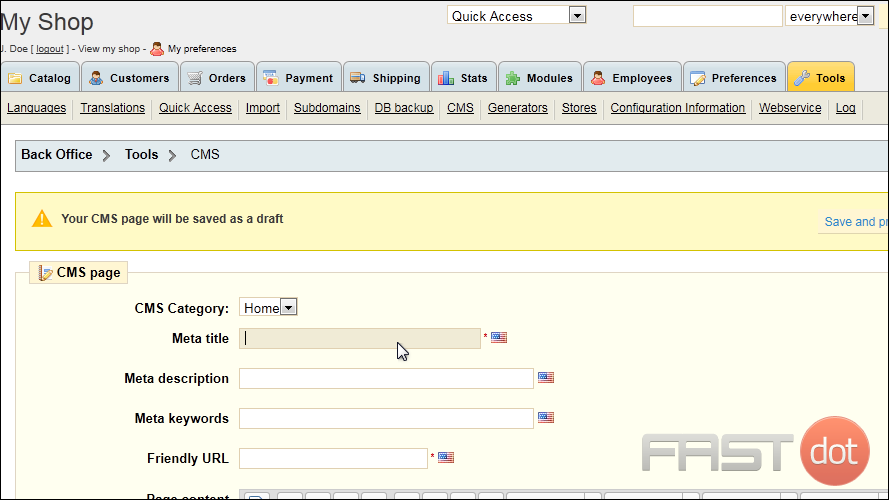
11) Type your page content in this box.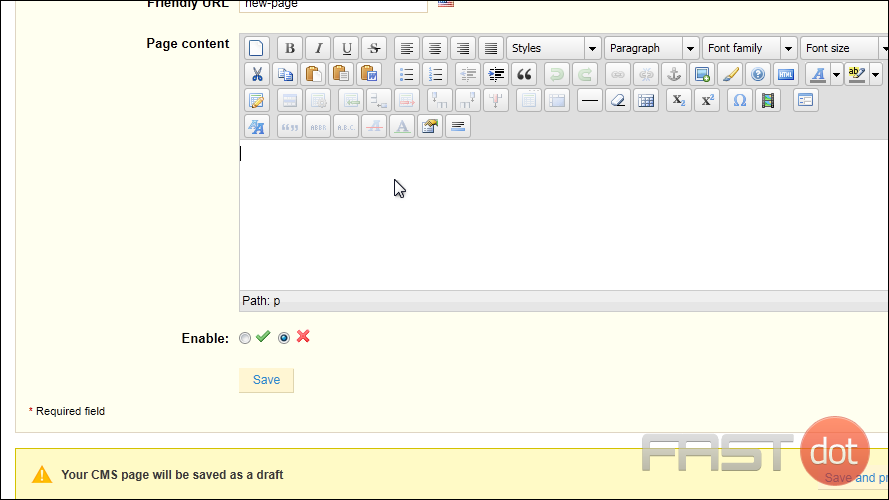
12) Select this option if you want to enable the page.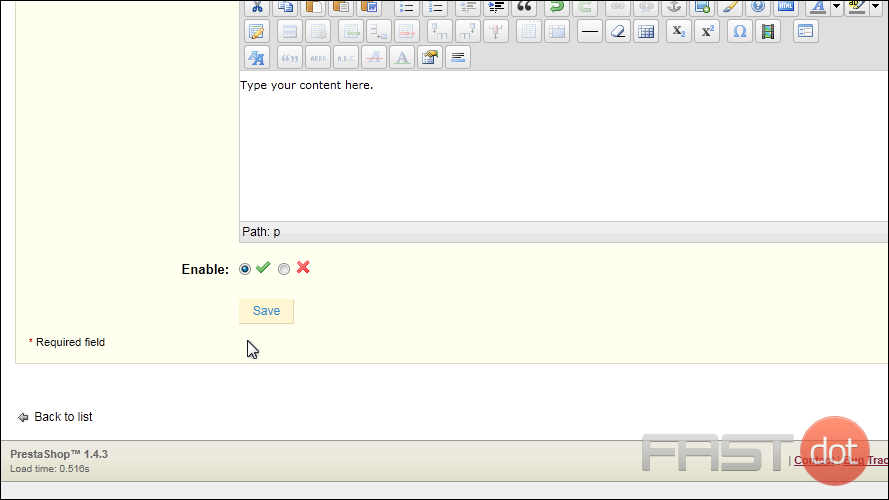
13) Click Save.
That’s it! Now you know how to create and edit pages using the CMS editor in PrestaShop.


