6. How to create tags in PrestaShop
Using descriptive tags will help your customers quickly and easily find what they want.
1) To create tags, go to Catalog.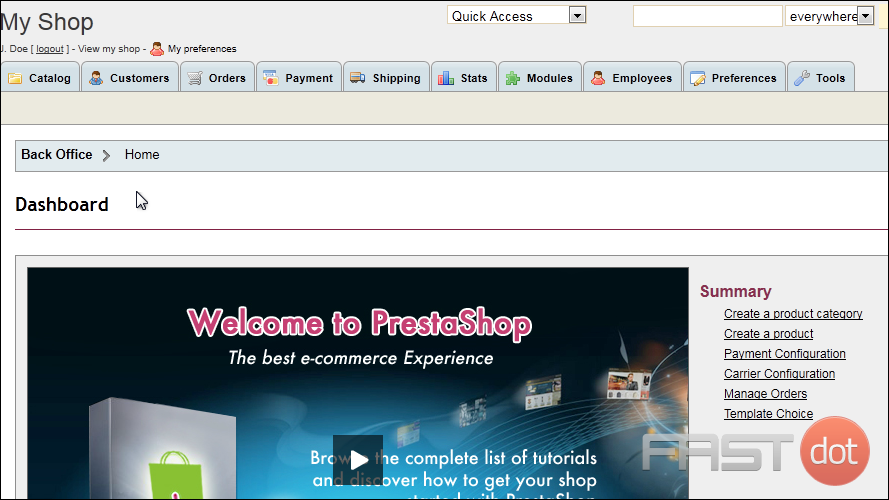
2) Then click Tags.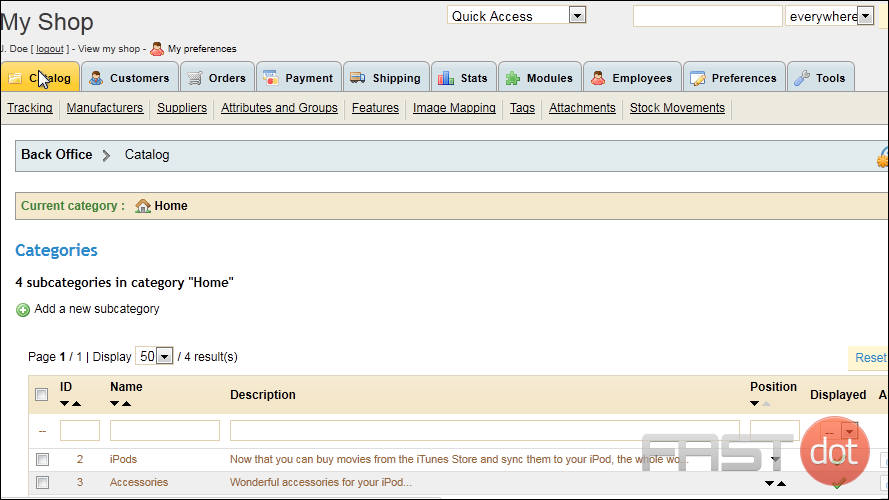
3) Click Add New.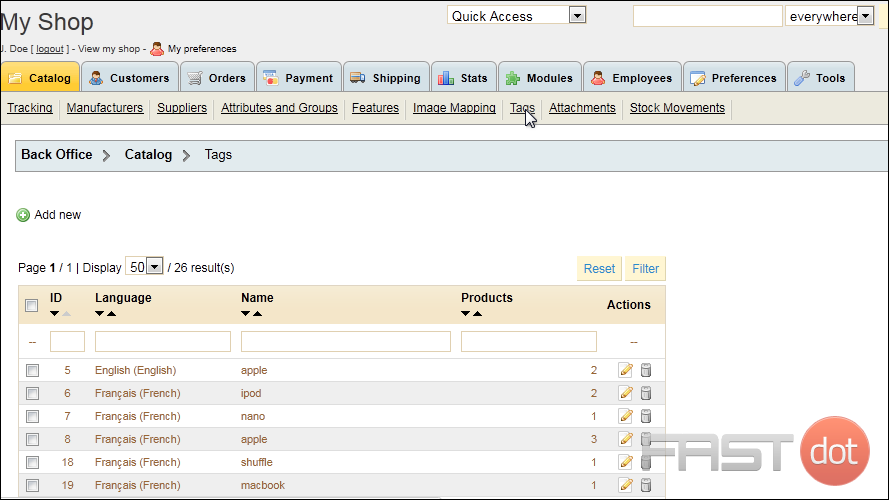
4) Enter a Name for the tag.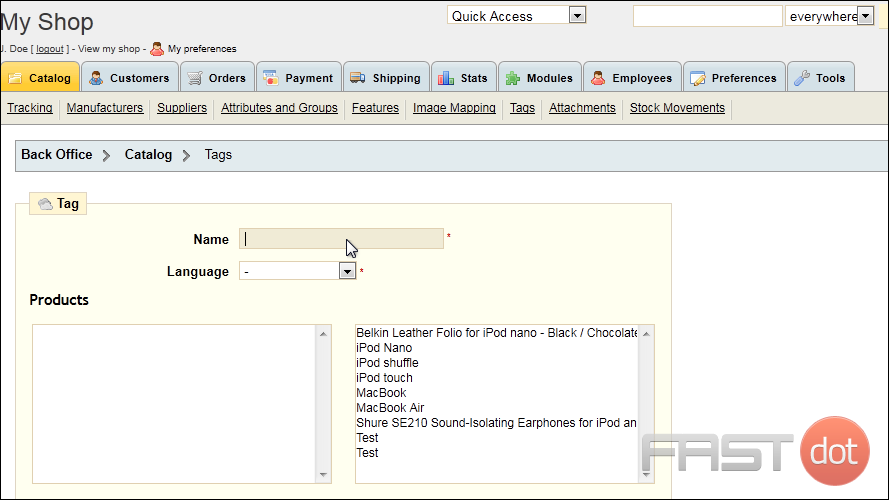
5) Choose the Language.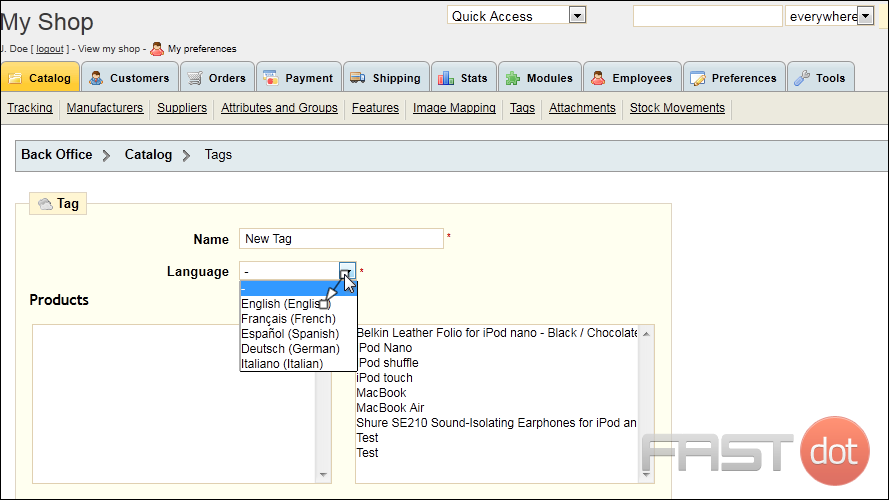
6) Hold down the Control key and click on the products to which this tag applies.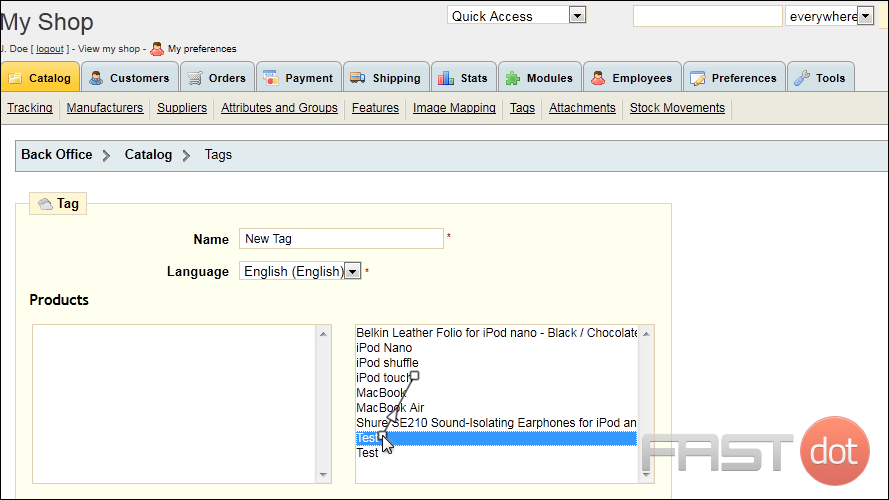
7) Click Add.
8) Click Save.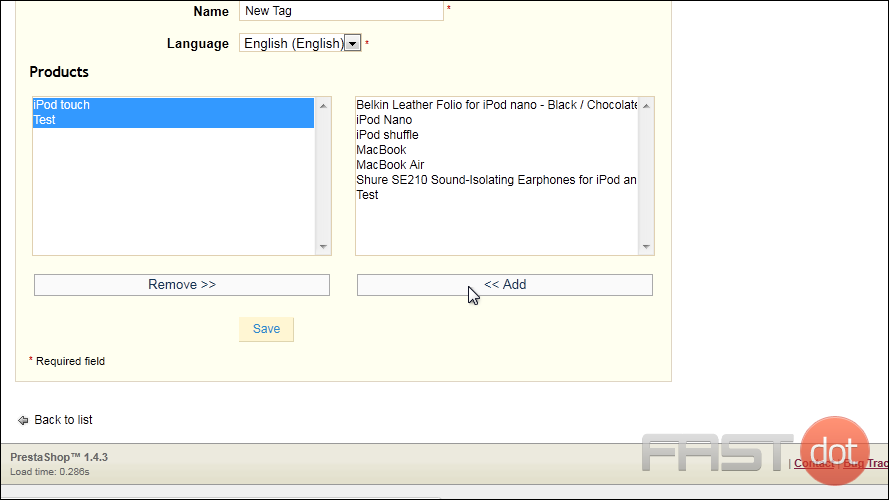
That’s it! Now you know how to create and use tags in PrestaShop.
How to Create Tags in PrestaShop
Step 1: Access the Tags Section
- Log in to your PrestaShop admin panel.
- In the left-hand sidebar, navigate to Catalog and then click on Tags.
Step 2: Add a New Tag
- Click on the Add new tag button at the top right corner.
- You will be taken to a form where you can create the new tag.
Step 3: Fill in the Tag Information
- Name: Enter the name of the tag. This is the keyword that will be associated with products.
- Use descriptive and relevant keywords that best represent the product features.
- Avoid overly generic tags to ensure precision in search results.
- Language: Select the language for the tag. If your store supports multiple languages, you will need to create tags for each language separately.
- Ensuring tags are available in multiple languages can enhance the user experience for a global customer base.
- Products: Begin typing the names of the products you want to associate with this tag. A dropdown list of matching products will appear. Select the products you want to tag.
- Associating multiple products with a single tag can help customers find related items more easily.
- Click Save to create the tag.
Step 4: Manage Existing Tags
- In the Tags section, you will see a list of all existing tags.
- You can edit a tag by clicking on the Edit button (pencil icon) next to the tag.
- Update tag names, products associated, or language settings as needed.
- To delete a tag, click on the Delete button (trash icon) next to the tag. Confirm the deletion when prompted.
- Removing outdated or irrelevant tags helps keep your tag list organised.
Step 5: Assign Tags to Products Directly
- Go to Catalog > Products in the left-hand sidebar.
- Select the product you want to tag by clicking on its name.
- In the product’s editing page, navigate to the SEO tab.
- In the Tags field, enter the tags you want to associate with the product. Separate multiple tags with commas.
- Using multiple relevant tags can increase the visibility of the product in search results.
- Click Save to update the product.
Step 6: Utilise Tags for SEO and Customer Experience
- SEO Optimisation: Tags can significantly impact your store’s SEO. Use tags that are commonly searched by customers to improve your product rankings on search engines.
- Conduct keyword research to identify popular search terms related to your products.
- Enhanced Navigation: Tags can help customers navigate your store more efficiently by allowing them to filter products based on specific characteristics.
- Implement tag filters on your product pages to enhance user experience.
- Tag Clouds: Display tag clouds on your store to showcase popular tags, encouraging customers to explore different product categories.
- Tag clouds visually represent the frequency of tag usage, with more frequently used tags appearing larger.
Additional Tips for Using Tags
- Consistency: Maintain consistency in tag usage to ensure that related products are easily discoverable.
- Standardise tag naming conventions across your product catalog.
- Relevance: Regularly review and update tags to keep them relevant to your products and customer searches.
- Remove tags that no longer apply to any products.
- Customer Insight: Analyse customer search patterns to identify new tags that can be added to improve discoverability.
- Use analytics tools to track tag performance and adjust as needed.

