How to Manage Your Customers in PrestaShop
Step 1: Access the Customers Section
- Log in to Your PrestaShop Admin Panel
- Access your admin panel by entering your store’s admin URL and logging in with your credentials.
- Navigate to the Customers Section
- In the left-hand sidebar, navigate to Customers and then click on Customers.
Step 2: View Customer Information
- Customer List
- You will see a list of all registered customers, including their name, email, registration date, last visit, and more.
- Use the search bar and filters to find specific customers based on various criteria.
- View Customer Details
- Click on a customer’s name to view detailed information about that customer, including their contact details, orders, and account activity.
Step 3: Add a New Customer
- Click on the Add New Customer Button
- Click the Add new customer button at the top right corner.
- Fill in Customer Information
- First Name: Enter the customer’s first name.
- Last Name: Enter the customer’s last name.
- Email Address: Enter the customer’s email address.
- Password: Set a password for the customer’s account.
- Birthday: Optionally, enter the customer’s birthday.
- Newsletter: Indicate whether the customer is subscribed to the newsletter.
- Status: Choose whether the customer account is active.
- Save the Customer
- Click the Save button to create the new customer account.
Step 4: Edit Existing Customers
- Edit Customer Information
- Click on the Edit button (pencil icon) next to the customer you want to edit.
- Update any necessary information, such as contact details, account status, or customer groups.
- Save Changes
- Click the Save button to apply the changes.
Step 5: Manage Customer Groups
- Navigate to Customer Groups
- In the left-hand sidebar, navigate to Customers and then click on Groups.
- Add a New Group
- Click on the Add new group button.
- Enter the group name and any discounts that apply to this group.
- Click the Save button to create the new group.
- Assign Customers to Groups
- Edit a customer’s details and select the appropriate group(s) under the Group access section.
- Save the changes to update the customer’s group membership.
Step 6: Communicate with Customers
- Send Emails
- Use the email functionality in PrestaShop to communicate with your customers.
- Navigate to Advanced Parameters > Email to configure your email settings.
- Use the Contact section to send emails to individual customers or customer groups.
- Manage Customer Service Tickets
- Navigate to Customer Service in the left-hand sidebar to manage customer service inquiries.
- Respond to customer tickets and keep track of ongoing issues.
Step 7: View Customer Orders
- Access Orders
- Navigate to Orders > Orders in the left-hand sidebar.
- Click on an order to view detailed information, including the customer’s details and order history.
- Order Management
- Use the order management tools to process, update, and track customer orders.
Additional Tips for Managing Customers
- Segmentation: Segment your customers into different groups based on purchasing behaviour, demographics, or other criteria to provide targeted marketing and personalised service.
- Loyalty Programs: Implement loyalty programs to reward repeat customers and encourage customer retention.
- Analytics: Use customer data analytics to gain insights into customer behaviour and preferences, helping you make informed business decisions.
- Security: Ensure customer data is securely stored and complies with data protection regulations such as GDPR.
11. How to manage your customers in PrestaShop
This tutorial will show you how to add customers and customer groups.
1) Go to Customers.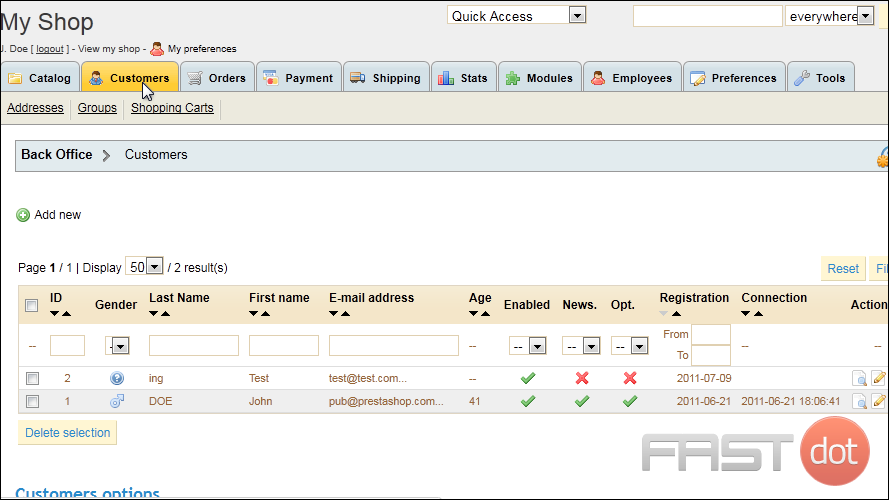
2) Click Groups.
3) To create a group, click Add New.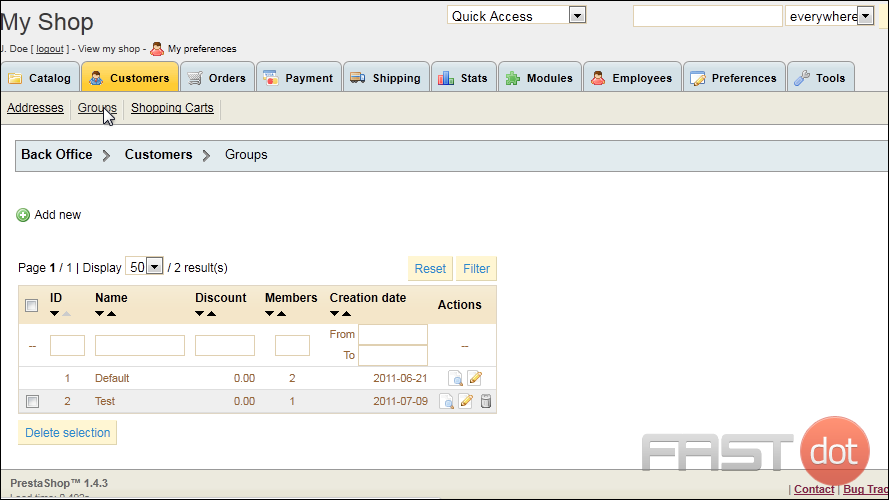
4) Type a Name for the group.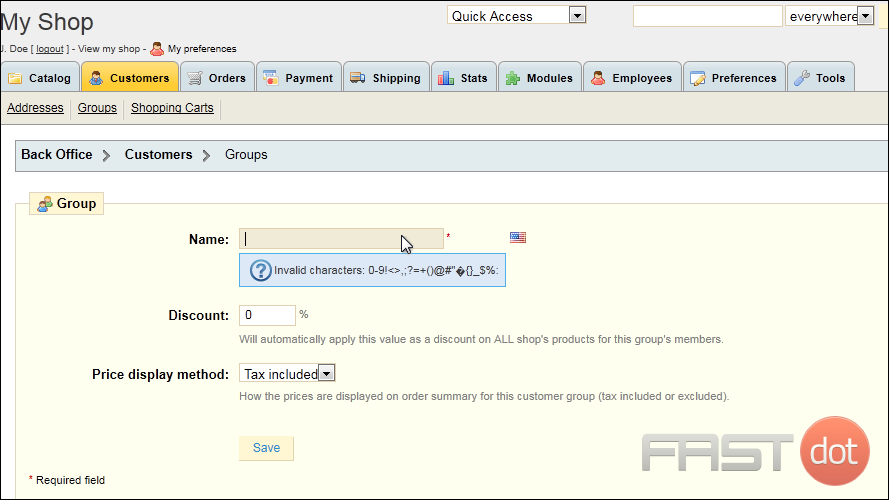
5) If you want this group to automatically receive a discount on all products in your store, enter a percentage here.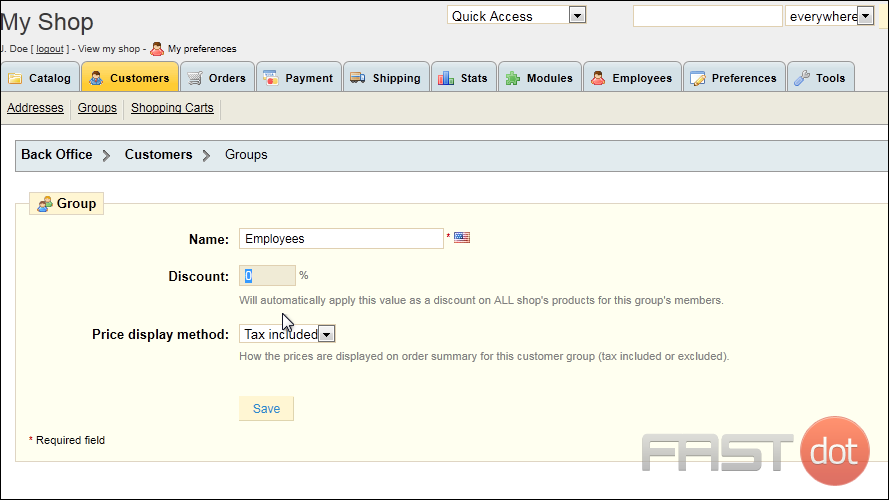
6) Click Save.
Now that we’ve made a group, let’s create a new customer to add to the group.
7) Click Customers.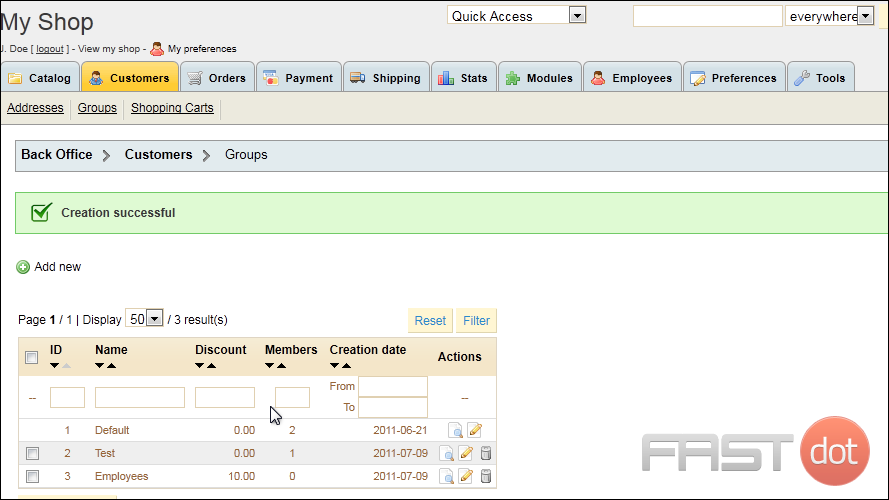
8) Click Add New.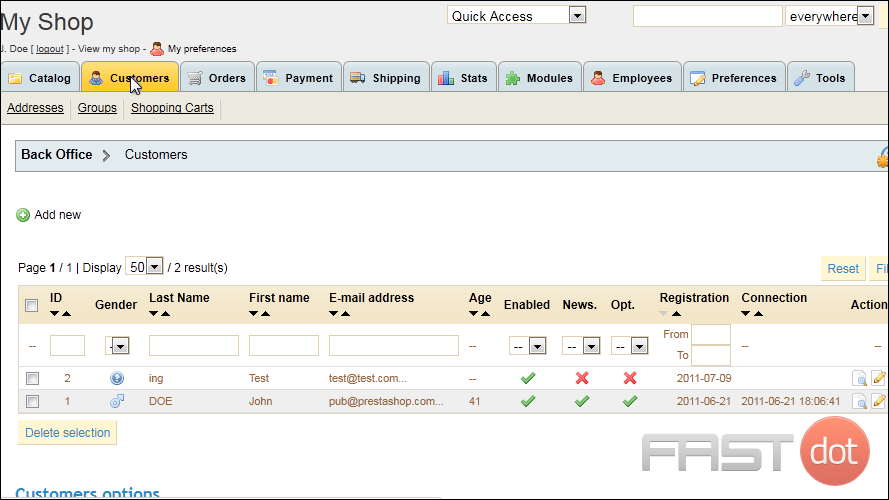
9) Enter the customer’s Last and First names.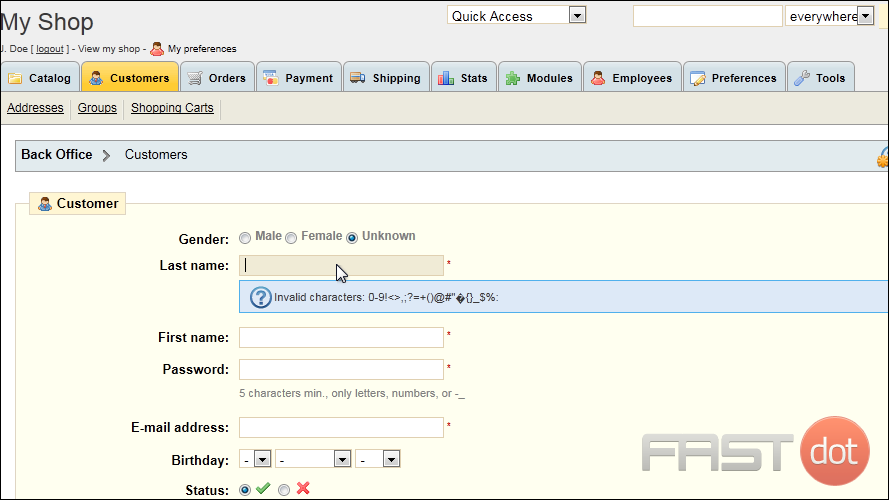
10) Type a Password.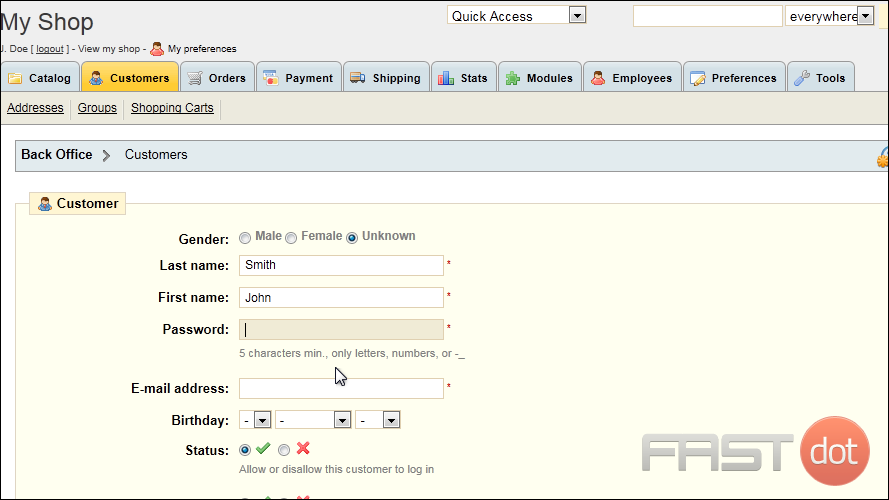
11) Enter the customer’s E-mail Address.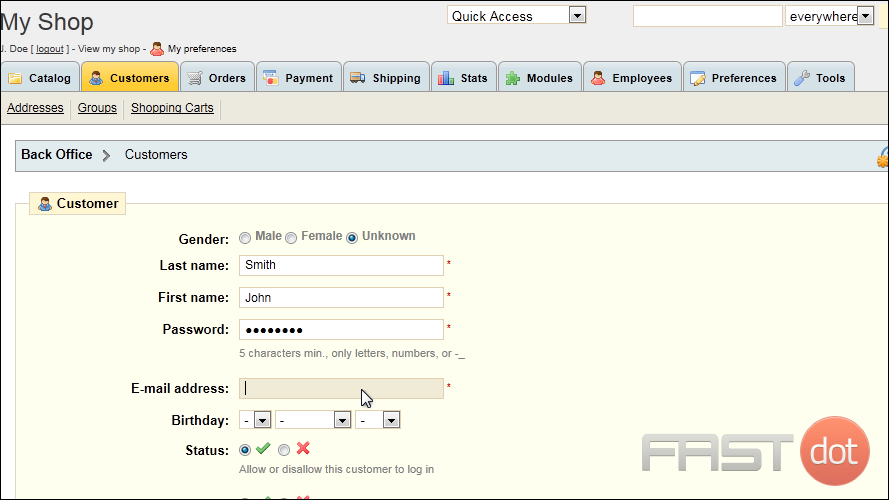
12) For the Default Group, select the new group we created.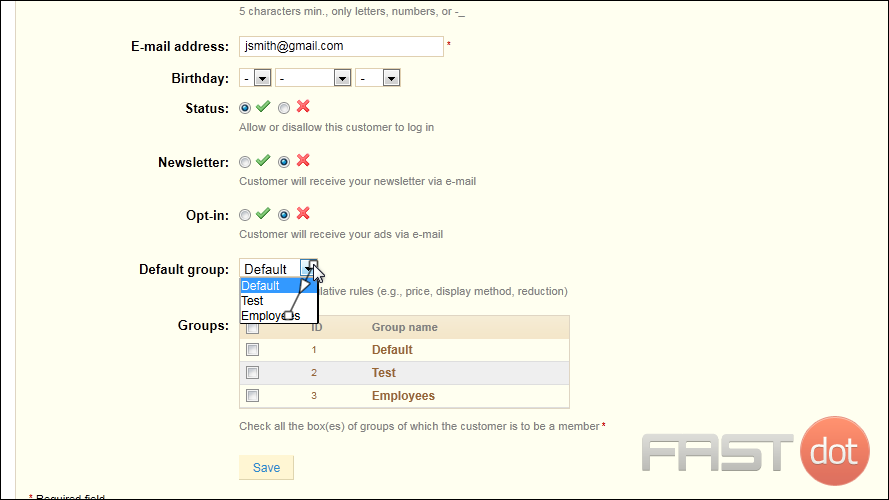
13) Click Save.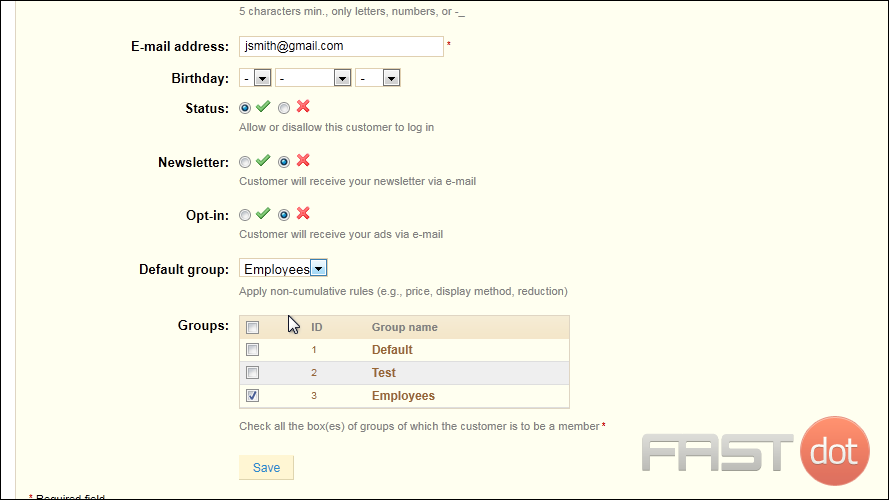
Now that we’ve created a customer and assigned him to a group, we can add an address for him.
14) Click Addresses.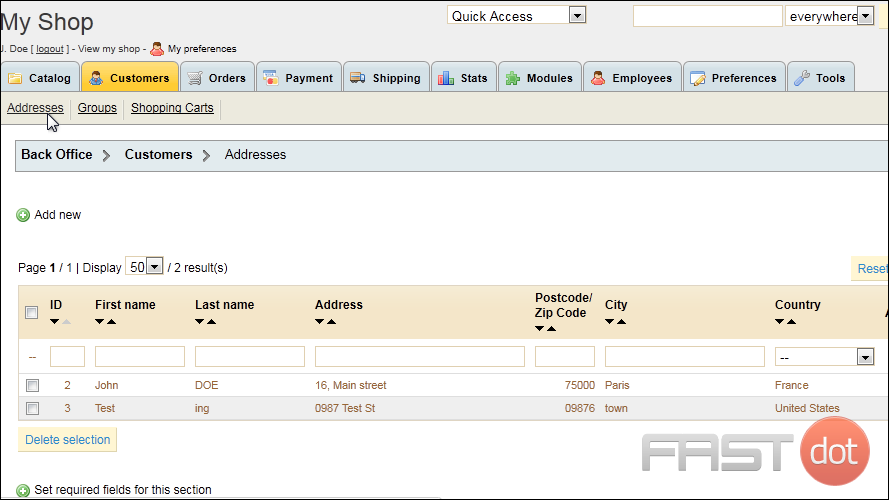
15) Click Add New.
16) Type the Customer’s E-mail Address, which must already exist in the system before you can associate an address with it.
17) Type an Alias.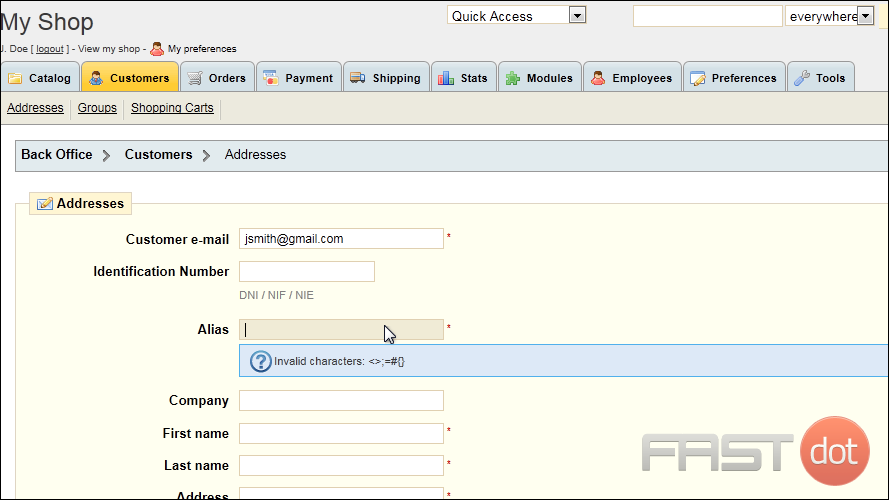
18) Type the customer’s First and Last Name.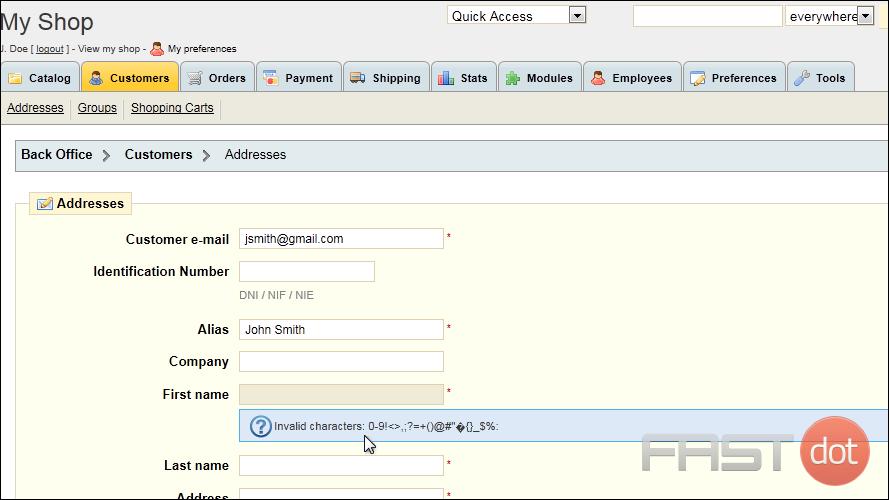
19) Enter the customer’s address including the street, city, country and postal code.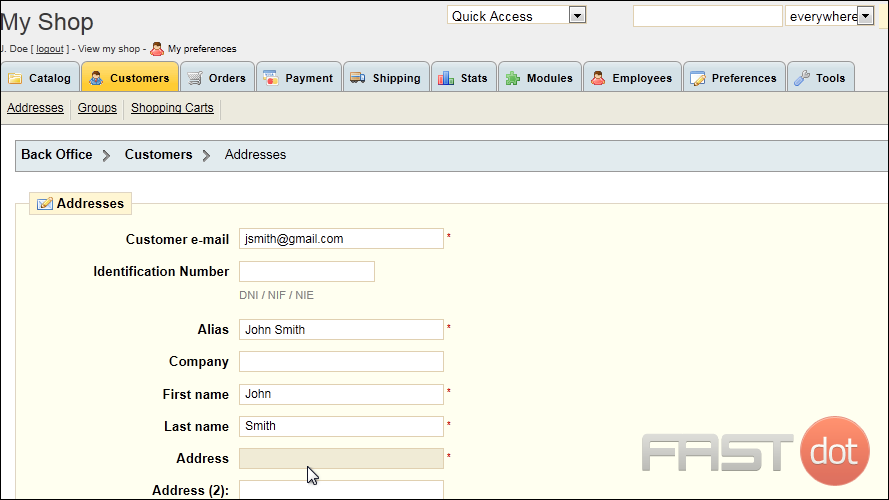
20) Click Save.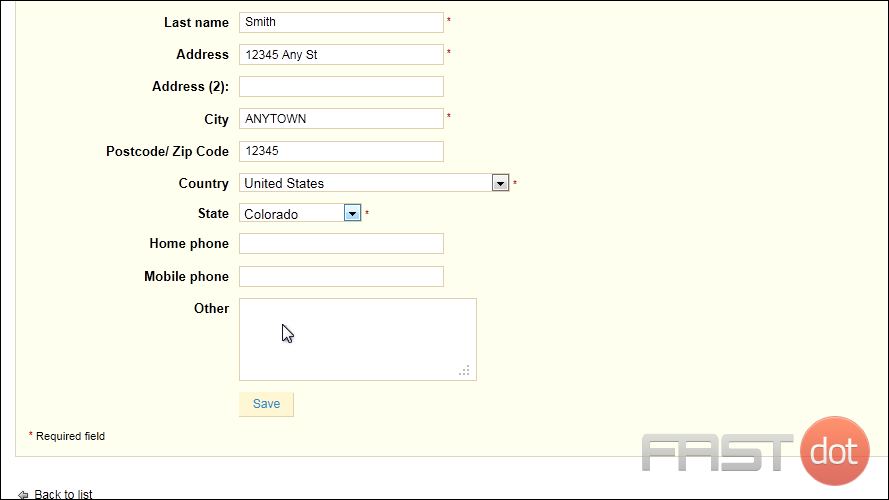
That’s it! Now you know how to manage your customers in PrestaShop.

