Step 1: Access the Tax Section
- Log in to Your PrestaShop Admin Panel
- Access your admin panel by entering your store’s admin URL and logging in with your credentials.
- Navigate to the Tax Section
- In the left-hand sidebar, navigate to International and then click on Taxes.
Step 2: Add or Edit a Tax Rate
- View Existing Tax Rates
- You will see a list of all existing tax rates, including their names and percentages.
- Add a New Tax Rate
- Click the Add new tax button at the top right corner.
- Fill in the following details:
- Name: Enter a name for the tax rate (e.g., “VAT 20%”, “Sales Tax 5%”).
- Rate: Enter the tax rate as a percentage (e.g., 20, 5).
- Enable: Choose whether to enable this tax rate.
- Click the Save button to create the new tax rate.
- Edit an Existing Tax Rate
- Click on the Edit button (pencil icon) next to the tax rate you want to modify.
- Update the necessary details (e.g., change the tax rate percentage).
- Click the Save button to apply the changes.
Registering a domain name is a fundamental step in establishing an online presence, whether it’s for a personal project, a business, or any other endeavor.
Progressive Mix of World News and Propaganda
Migrating from GoDaddy Website Builder to WooCommerce
Building an online store with a Website Builder is a great starting point for a new business.
WordPress Security Vulnerabilities and Solutions
Perform an SEO Audit for WordPress
Step 3: Manage Tax Rules
- Navigate to Tax Rules Section
- In the Taxes section, click on Tax Rules.
- View Existing Tax Rules
- You will see a list of tax rules that apply different tax rates based on various conditions, such as the customer’s location.
- Add a New Tax Rule
- Click the Add new tax rules group button.
- Fill in the following details:
- Name: Enter a name for the tax rules group (e.g., “EU VAT Rules”, “US Sales Tax Rules”).
- Enable: Choose whether to enable this tax rules group.
- Click the Save and stay button.
- Add Rules to the Group
- After creating the tax rules group, you can add specific rules to it:
- Click the Add new tax rule button.
- Country: Select the country to which this rule applies.
- State: Optionally, select a state within the country.
- Zip/Post Code Range: Specify a range of postal codes if the rule applies to specific areas.
- Tax: Choose the tax rate to apply from the dropdown menu.
- Description: Optionally, provide a description for internal use.
- Click the Save and stay button to add the rule. Repeat this process to add more rules to the group.
- After creating the tax rules group, you can add specific rules to it:
Step 4: Assign Tax Rules to Products
- Navigate to the Products Section
- In the left-hand sidebar, navigate to Catalog and then click on Products.
- Edit a Product
- Select the product you want to edit by clicking on its name.
- In the product’s editing page, navigate to the Prices tab.
- Assign a Tax Rule
- In the Tax rule dropdown menu, select the appropriate tax rules group that applies to this product.
- Click the Save and stay button to apply the changes. Repeat this process for all products that require the new tax rule.
Step 5: Test and Verify
- Test the Changes
- Visit the front end of your store and add products to the cart to ensure the correct tax rates are being applied.
- Check the order summary and invoices to verify that the correct tax rates are displayed.
- Verify with Different Locations
- Simulate purchases from different locations to ensure that the tax rules are correctly applied based on the customer’s address.
Additional Tips for Managing Tax Rates
- Stay Updated: Regularly check for updates to tax laws in the regions where you operate and adjust your tax rates accordingly.
- Consult a Tax Professional: For complex tax scenarios, consider consulting a tax professional to ensure compliance with all applicable laws.
- Backup Your Store: Before making significant changes to tax settings, backup your PrestaShop store to avoid data loss.
9. How to change tax rates in PrestaShop
Setting up tax rules allows you to use different tax rates for different countries or states.
1) First, we have to set up a Tax Rate, so go to Payment.
2) Click Taxes.
3) Click Add New.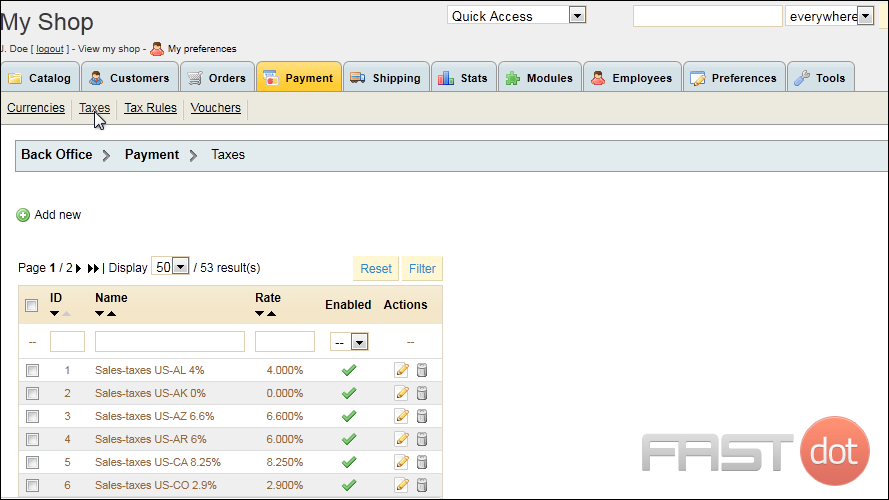
4) Enter a Name that will be shown in the customer’s cart and on their invoice.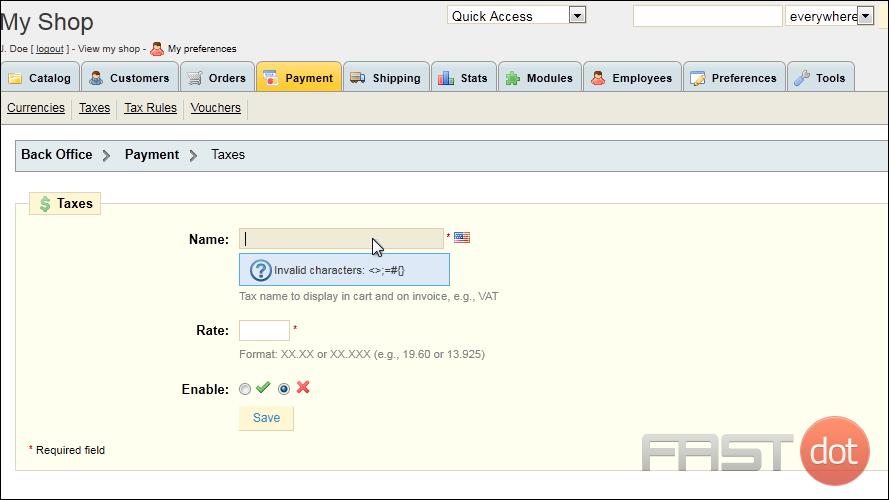
5) Set the tax Rate.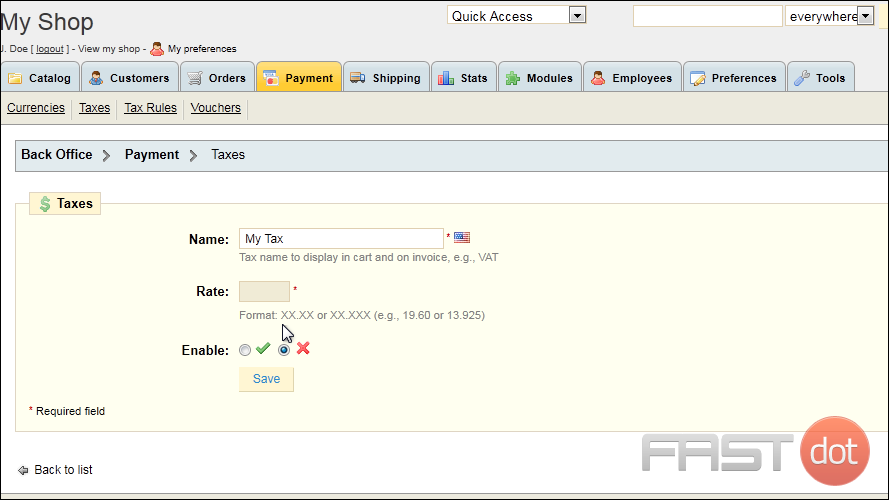
6) Enable this tax rate if you want to use it.
7) Click Save.
Now that we’ve set up our tax rate, we can apply it to specific countries or states.
8) Click Tax Rules.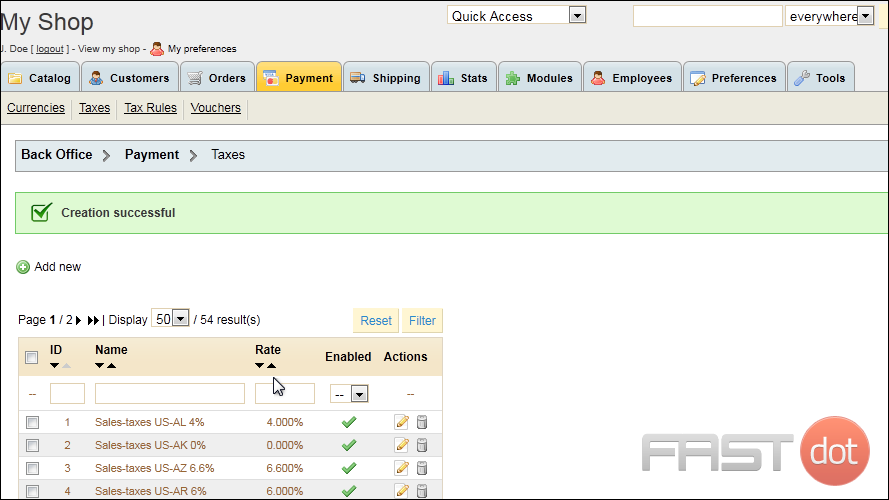
9) Click Add New.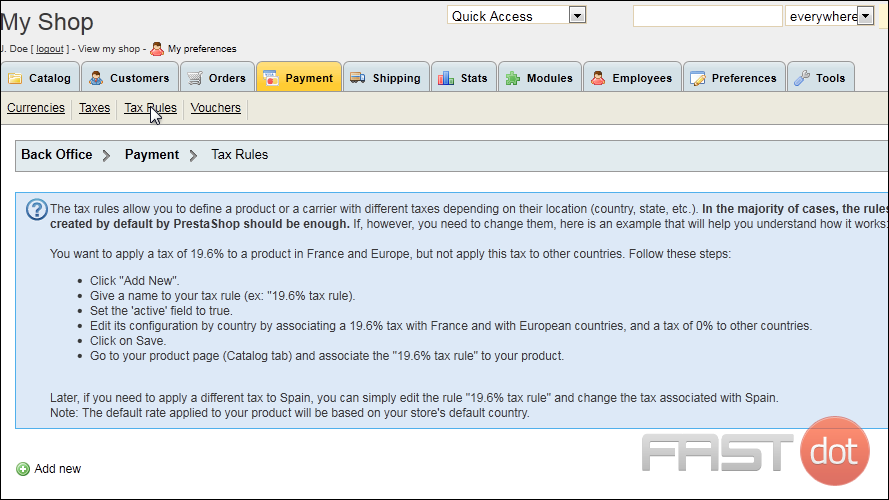
10) Enter a Name for this tax rule.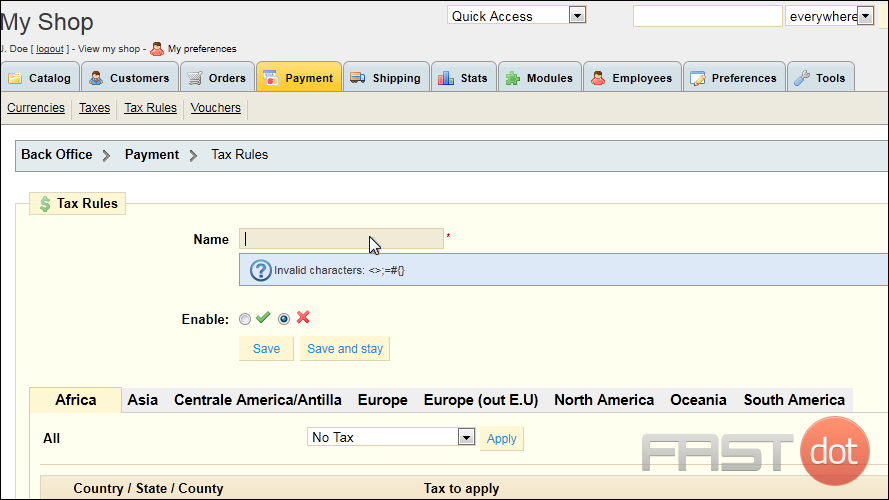
11) Enable this tax rule to make it active.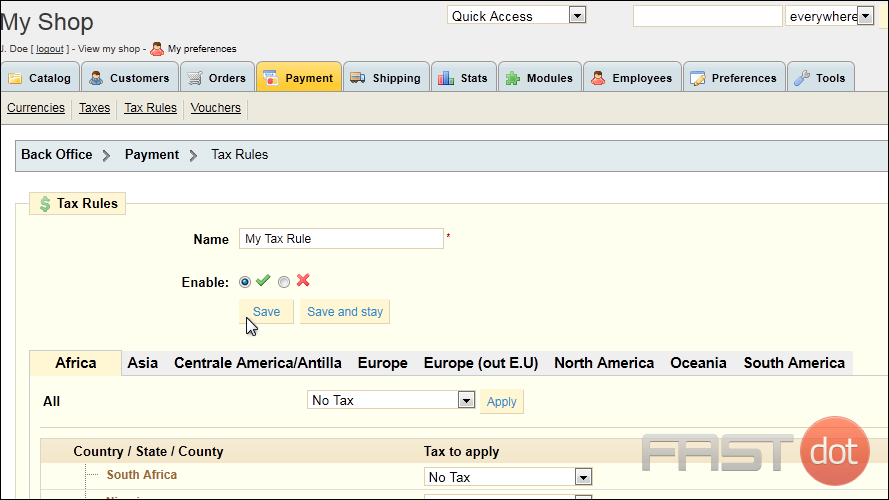
12) Select the continent where the country or state is located from these tabs at the top.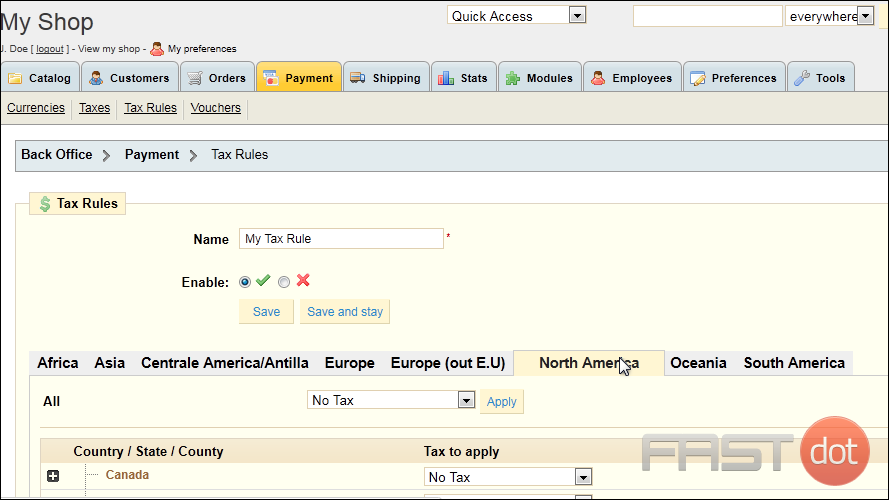
13) Click a plus sign to expand the list.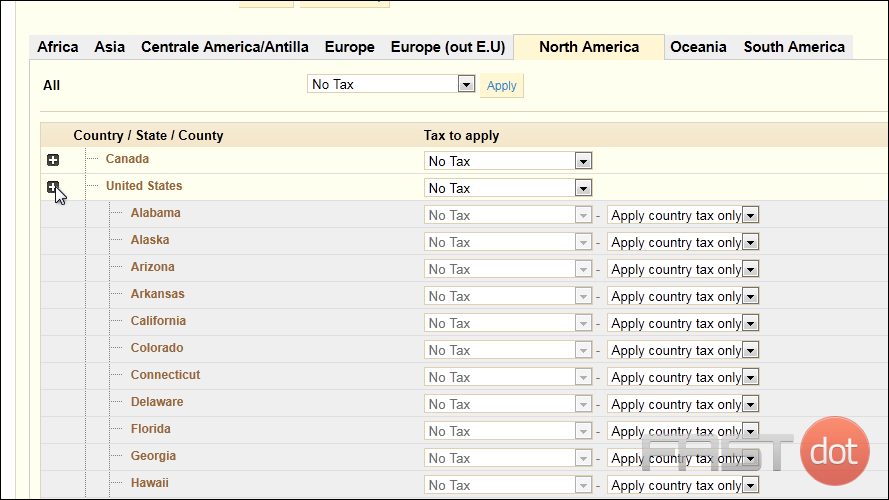
For each state, you can choose which tax to apply.
14) Choose to apply only country tax, only state tax, or both.
If you choose to apply state tax, you can then set the appropriate tax rate for that state.
15) We’ll select the tax rate we created earlier.
Follow these steps to set a different tax rate for each country, state or county. Or you can set a tax rate for all areas by choosing it from this dropdown.
16) Click Save.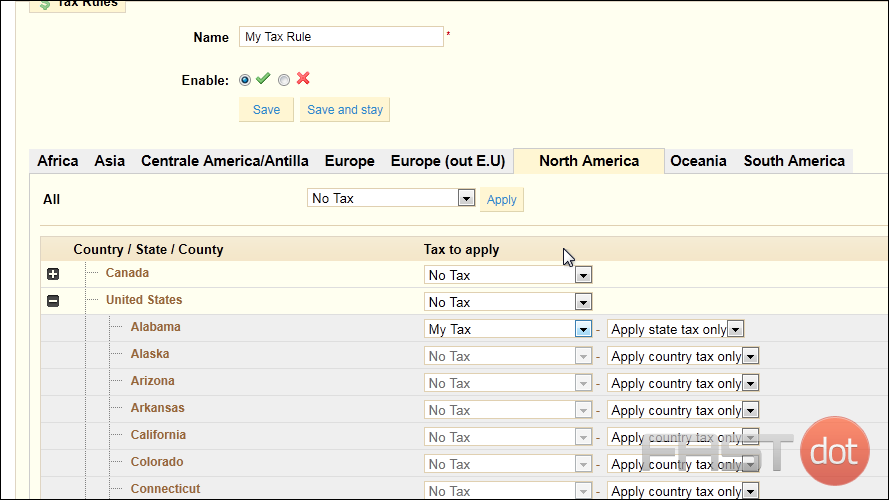
That’s it! Now you know how to setup tax rates in PrestaShop.

